
Analog Glitch Photography: Circuit Bend Your Camera
Break your camera on purpose—the glitches are the art.
About This Quest
Master analog glitch photography by circuit bending cameras, corrupting film data, and creating unpredictable visual artifacts through hardware manipulation.
Digital photography is too predictable. Every pixel lands where algorithms tell it to, every color calibrated to perfection. Analog glitch photography throws that control out the window. You're physically manipulating disposable cameras, shorting circuits mid-exposure, light-leaking film deliberately, and treating photographic equipment like a musical instrument that's meant to malfunction. The process feels like surgery and sabotage combined. You'll crack open a disposable camera with a screwdriver, identify the capacitor that powers the flash, and touch exposed wires to metal surfaces while the shutter's open. The resulting images—streaked with electromagnetic interference, color-shifted from voltage fluctuations, layered with unintended exposures—look nothing like what you pointed the lens at. That's the point. This isn't Photoshop filter mimicry. The grain, the light bleeds, the way circuits physically corrupt photochemical processes—these create artifacts that digital tools can approximate but never authentically replicate. You're working with electricity, chemistry, and chance. The best shots come from the ones where you barely controlled anything at all.
Why This Quest Matters
You create images that cannot exist through digital means—grain patterns from physical circuit corruption, light artifacts from actual photochemical disruption, electromagnetic interference burned directly onto film. The unpredictability is the medium. Your best work comes from controlled failure.
What You'll Experience
- How to safely discharge and manipulate camera electronics
- Physical techniques for corrupting photographic processes
- Which circuit modifications produce repeatable vs. random glitches
- Film development workflow that preserves artifacts instead of correcting them
- How to document experiments so you can replicate successful failures
What You'll Need
Top gear to make this quest great.
Pull it off
Precision Screwdriver Set with Insulated Handles
Essential for safely disassembling cameras and discharging capacitors without electric shock—rubber grips are mandatory when working with charged circuits
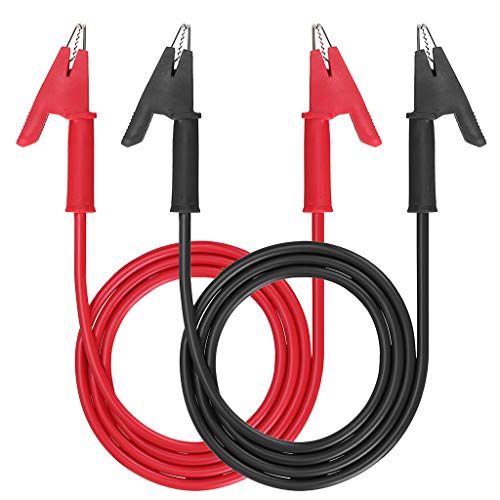
Allows hands-free circuit bending by connecting different points on the camera's circuit board while you operate the shutter—the core tool for creating electrical glitches
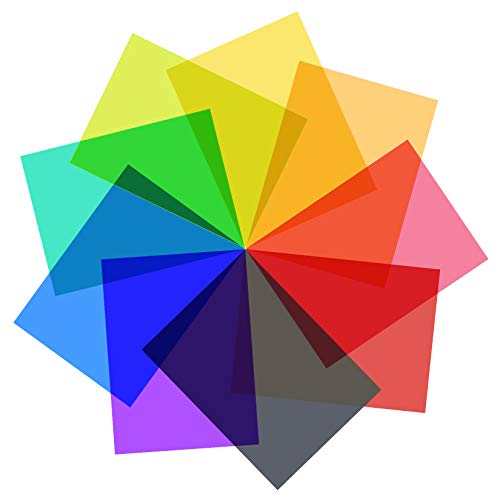
Creates controlled light leaks with specific color casts when cut to fit over drilled holes—produces more intentional results than random light bleeding
As an Amazon Associate I earn from qualifying purchases. Prices may change.
Step-by-Step Guide
Acquire and dissect disposable cameras
Buy 2-3 disposable cameras (Fujifilm QuickSnap or Kodak FunSaver). Peel off the cardboard shell with a flathead screwdriver, working slowly around edges to keep the plastic housing intact. Pop out the battery, then discharge the flash capacitor by touching both terminals with an insulated screwdriver—you'll see a spark.
💡 Pro Tips:
- • Plan to destroy one camera while learning the layout
- • The capacitor holds enough charge to seriously shock you—never skip the discharge step
Map the circuit board internals
Study the exposed circuit board for 10 minutes. Locate the flash capacitor (silver cylinder), shutter mechanism (tiny lever by the lens), and film advance gear. Photograph the layout with your phone for reference during modifications.
💡 Pro Tips:
- • This reference photo becomes critical when you're reassembling after glitching
Establish baseline exposures
Load 35mm film—black and white if you'll self-develop, color negative if using a lab. Shoot half the roll normally without modifications. These baseline frames show you what the camera produces before you corrupt it.
Apply glitch techniques to remaining frames
Experiment with one technique per frame: hold the camera near a CRT monitor during 1-2 second exposures for scan lines; use alligator clips to bridge random circuit points while firing; drill 1/8-inch holes near the film plane and cover with colored gels for light leaks. Write down what you modified for each shot.
💡 Pro Tips:
- • Most circuit bending attempts fail—you're hunting for the 2-3 frames where chaos creates something striking
- • Connecting the flash capacitor to the film motor can create voltage-spiked double exposures
Develop without corrections
For black and white film, develop yourself using Ilford chemicals and a changing bag. For color, send to a lab and specify no auto-correction or color balancing—you want the glitches preserved, not fixed.
💡 Pro Tips:
- • Scan at 3000+ DPI minimum; glitches create micro-textures that disappear at lower resolution
Correlate chaos with results
Compare your modification notes with the developed frames. The keepers are where something unexpected happened—electromagnetic streaks you didn't predict, color shifts from voltage fluctuations, light bleeds that created layered exposures. These accidents are your actual portfolio.
Gear Up for Your Quest
The gear that makes this quest work.
Pull it off

Precision Screwdriver Set with Insulated Handles
Essential for safely disassembling cameras and discharging capacitors without electric shock—rubber grips are mandatory when working with charged circuits
+ complete the kit — 4 more

Allows hands-free circuit bending by connecting different points on the camera's circuit board while you operate the shutter—the core tool for creating electrical glitches
Insulated wire jumpers with spring-loaded clips on both ends
Get on Amazon · $7.99 — Alligator Clip Test Leadsdetails & deals →
Theatrical Gel Filter Sheets
RecommendedCreates controlled light leaks with specific color casts when cut to fit over drilled holes—produces more intentional results than random light bleeding
Heat-resistant colored cellophane used in stage lighting, typically 10x12 inch sheets in red, orange, and magenta
Get on Amazon · $7.98 — Theatrical Gel Filter Sheetsdetails & deals →
Lets you develop film at home in 10 minutes without a darkroom—crucial for rapid iteration since you control the process and see results same-day instead of waiting on labs
Single-bottle B&W developer and fixer chemistry that doesn't require mixing or temperature control
Get on Amazon · $29.95 — Ilford Simplicity Black & White Film Developing Kitdetails & deals →
Changing Bag for Film Processing
OptionalEnables home film development anywhere—slip your hands inside, load the exposed film onto reels in total darkness, then develop in daylight
Light-proof zippered nylon bag with arm sleeves for loading film onto developing reels without a darkroom
Get on Amazon · $16.99 — Changing Bag for Film Processingdetails & deals →RELATED GEAR GUIDE
Fermentation & Canning Kit: 8 Beginner Picks
Field-tested picks · Creative Arts
As an Amazon Associate, IRL Sidequests earns from qualifying purchases at no extra cost to you.
Prices and availability are subject to change. The price shown at checkout on Amazon at the time of purchase will apply.
Editor's Picks
Hand-selected quests our team thinks you'll love

Dawn Patrol: Your First Bird Watching Adventure
Wake up with the birds and see your neighborhood through new eyes.

Creative Skills Quest Hub: Learn By Doing
The best way to learn creative skills? Make bad art until it gets good.

Hand-Built Ceramic Bowl Workshop
Your hands built the first bowls 20,000 years ago. They still can.