
DIY Block Printing with Found Objects
Your junk drawer is actually a printmaking studio—bottle caps, cardboard, and leaves become stamps for original patterns.
About This Quest
Turn bottle caps, cardboard, and leaves into custom printing blocks. Learn relief printing techniques using household items to create repeating patterns on fabric and paper.
Block printing doesn't require expensive linoleum blocks or sharp carving tools. Your kitchen, recycling bin, and sidewalk cracks hold everything you need to make repeating patterns on tea towels, tote bags, or art prints. Bottle caps become circles, corrugated cardboard cuts into geometric shapes, and fallen leaves print their own veins. The process is immediate—coat your found object, press it down, lift to reveal the print. This technique sits between stamping and traditional relief printing. You're not carving into a block, you're building up layers by gluing textured materials onto cardboard backing. Old shoelaces become spirals. Mesh produce bags create screen-like textures. Rubber bands stretched across foam create striped patterns. The ink sits on raised surfaces, so anything with texture becomes printable. The real skill is in repetition and spacing. Print the same element in a grid, offset like bricks, or scatter randomly. Mix textures within one composition—rough bark prints next to smooth bottle cap circles. Work on paper first to dial in pressure and ink coverage, then move to fabric once you've got the rhythm. Your prints will never be identical, and that's the point. Machine-perfect patterns exist everywhere; these carry the wobble of your hand.
Why This Quest Matters
You'll end up with tea towels or tote bags that look handmade because they are—each print carries the slight wobble of your pressure, the grain of real cardboard, the asymmetry of an actual leaf. These patterns can't be replicated by machines, and strangers will ask where you bought them. The best part: your printing blocks cost nothing and live in a shoebox, ready whenever you want to make something.
What You'll Experience
- How to recognize printable textures in everyday junk
- The mechanics of relief printing (ink on raised surfaces)
- Pattern-building through repetition, rotation, and spacing
- Pressure control—how hard to press for clean lifts
- Heat-setting techniques to make fabric prints permanent
What You'll Need
Top gear to make this quest great.
Pull it off
Speedball Block Printing Ink (water-soluble)
Standard acrylic paint is too thin and bleeds—block printing ink sits on the surface and creates clean, crisp edges when lifted. Water cleanup makes this beginner-friendly.
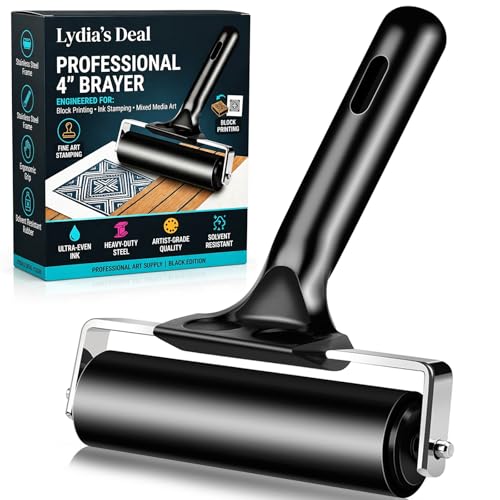
A foam brush applies ink unevenly and creates air bubbles. A brayer rolls a thin, consistent layer that transfers cleanly to your block without pooling in texture crevices.
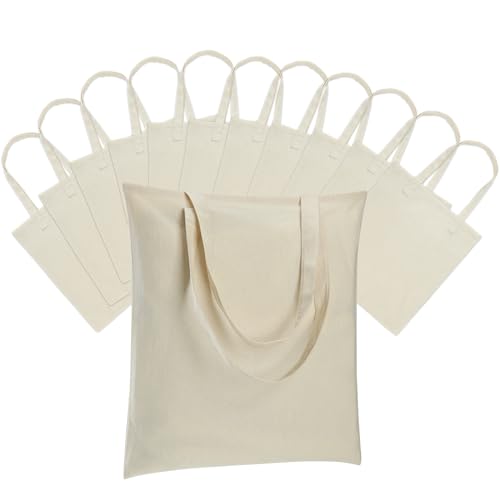
Pre-washed fabric absorbs ink better than stiff new fabric. Natural fibers (cotton, linen) grab ink cleanly while synthetics can repel water-based inks and create patchy prints.
As an Amazon Associate I earn from qualifying purchases. Prices may change.
Step-by-Step Guide
Collect textured objects and build blocks
Raid your recycling bin, junk drawer, and yard for bottle caps, corks, leaves with visible veins, corrugated cardboard, bubble wrap, or rubber bands. Glue them onto 3x3 inch cardboard squares—bottle caps go flat-side-down so the rim prints. Let glue dry 30 minutes minimum.
💡 Pro Tips:
- • Cut cardboard into geometric shapes (triangles, rectangles) for clean repeating patterns
- • Test leaves within an hour of picking—they dry out and lose detail fast
Secure your printing surface
Tape your fabric or paper flat to your work table so it won't shift mid-print. Slide cardboard underneath fabric to prevent ink bleeding through to the other side. Pour a puddle of printing ink onto a plastic plate.
💡 Pro Tips:
- • Start with paper for your first few prints to dial in pressure and ink amount before moving to fabric
Roll ink onto your block
Roll your brayer through the ink until the roller is evenly coated, then roll it across your printing block. The ink should look smooth and matte, not glossy or dripping. The roller should sound slightly tacky, not wet.
💡 Pro Tips:
- • Too much ink creates blurry prints—less is more
Press, hold, and lift straight up
Place your inked block on the fabric and press firmly with your palm for 3-4 seconds. Don't wiggle or rock—lift straight up in one motion. Your first print shows whether you need more pressure or less ink.
💡 Pro Tips:
- • Re-ink the block between every print; the ink layer depletes fast
Build your pattern with repetition
Print the same block in a grid, rotate it 90 degrees between prints, or alternate between different blocks. Leave white space around each print—crowded patterns become visual mud. Mix textures: rough bark next to smooth bottle caps creates contrast.
💡 Pro Tips:
- • Offset prints like bricks rather than perfect grids for more visual interest
Dry and heat-set fabric prints
Let everything dry flat for 24 hours. For fabric, iron the reverse side on medium heat for 3-4 minutes once the ink is bone-dry. This heat-setting makes your prints washable.
Gear Up for Your Quest
The gear that makes this quest work.
Pull it off

Speedball Block Printing Ink (water-soluble)
Standard acrylic paint is too thin and bleeds—block printing ink sits on the surface and creates clean, crisp edges when lifted. Water cleanup makes this beginner-friendly.
+ complete the kit — 3 more

A foam brush applies ink unevenly and creates air bubbles. A brayer rolls a thin, consistent layer that transfers cleanly to your block without pooling in texture crevices.
Small hand roller with rubber surface for spreading ink evenly
Get on Amazon · $6.69 — Soft Rubber Brayer (4-inch roller)details & deals →
Pre-washed Natural Fabric (canvas or muslin)
RecommendedPre-washed fabric absorbs ink better than stiff new fabric. Natural fibers (cotton, linen) grab ink cleanly while synthetics can repel water-based inks and create patchy prints.
Blank tote bags, tea towels, or fabric yardage
Get on Amazon · $16.98 — Pre-washed Natural Fabric (canvas or muslin)details & deals →
Textile Medium Additive
OptionalTransforms paper ink into permanent fabric ink that survives washing. Mix 1:1 with ink for softer prints that move with the fabric instead of sitting stiff on top. Skip this if only printing on paper.
Liquid additive mixed with block printing ink for fabric printing
Get on Amazon · $12.50 — Textile Medium Additivedetails & deals →RELATED GEAR GUIDE
Fermentation & Canning Kit: 8 Beginner Picks
Field-tested picks · Creative Arts
As an Amazon Associate, IRL Sidequests earns from qualifying purchases at no extra cost to you.
Prices and availability are subject to change. The price shown at checkout on Amazon at the time of purchase will apply.
Editor's Picks
Hand-selected quests our team thinks you'll love

Dawn Patrol: Your First Bird Watching Adventure
Wake up with the birds and see your neighborhood through new eyes.

Creative Skills Quest Hub: Learn By Doing
The best way to learn creative skills? Make bad art until it gets good.

Hand-Built Ceramic Bowl Workshop
Your hands built the first bowls 20,000 years ago. They still can.