
Screen Printing Your Own Street Art
Turn your sketches into wearable art with the same technique used by punk bands and street artists since the 1960s.
About This Quest
Learn beginner-friendly screen printing techniques to create custom patches, posters, and wearable art using photo emulsion methods.
Screen printing feels like magic the first time you pull a squeegee across mesh and see your design transfer perfectly onto fabric. This quest walks you through the photo emulsion method—the same process Warhol used, just scaled down for your kitchen table. You'll coat a screen with light-sensitive emulsion, expose your design using sunlight or a lamp, wash out the stencil, and pull your first prints. The smell of wet ink, the satisfying scrape of the squeegee, the moment you peel back the screen to reveal a crisp image—it's all deeply tactile in a way digital design can never match. Start with something simple: a two-color design, bold lines, high contrast. I learned this at a DIY print shop in Portland where the floor was sticky with decades of ink and everyone's first print came out slightly crooked. That's part of it. Your registration will be off, your ink coverage uneven, but by your fifth pull, you'll find the rhythm. The beauty of screen printing is its scalability—you can print one patch for your jacket or fifty posters for your band. Once you've made your screen, you can print hundreds of times before the emulsion breaks down. This quest focuses on fabric patches because they're forgiving, don't require a press, and you can heat-set them with an iron.
Why This Quest Matters
The moment you lift the screen and see your own design crisp on fabric is pure tactile satisfaction—no pixels, no undo button, just ink and mesh doing exactly what punk bands figured out decades ago. Once you've made a screen, you can print hundreds of patches, posters, or shirts before the emulsion breaks down, turning one afternoon of work into a reusable tool for marking the world with your images.
What You'll Experience
- How to coat and expose a photo emulsion screen that captures your design
- The squeegee angle and pressure that transfers ink cleanly onto fabric
- Why registration is always slightly off on your first pulls and how to adjust
- The rhythm of flooding and pulling that professional printers use
- How to heat-set fabric ink so your prints survive the washing machine
What You'll Need
Top gear to make this quest great.
Pull it off
Screen Printing Starter Kit
The screen and emulsion are the core of the process—110 mesh is the sweet spot for fabric because it lets enough ink through without bleeding. Pre-stretched frames save you hours of setup frustration.
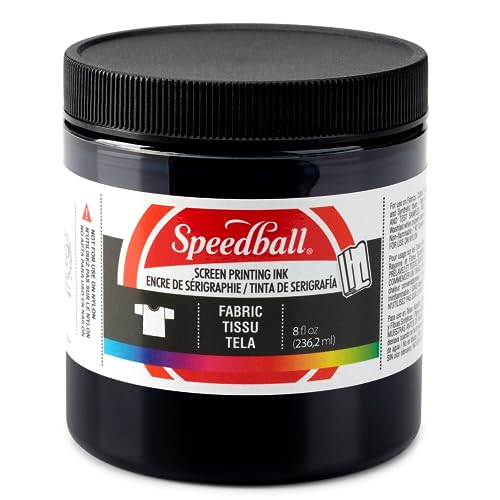
Fabric ink stays flexible after curing so prints don't crack when you move. Water-based means easy cleanup with soap and water, unlike plastisol which requires solvents.
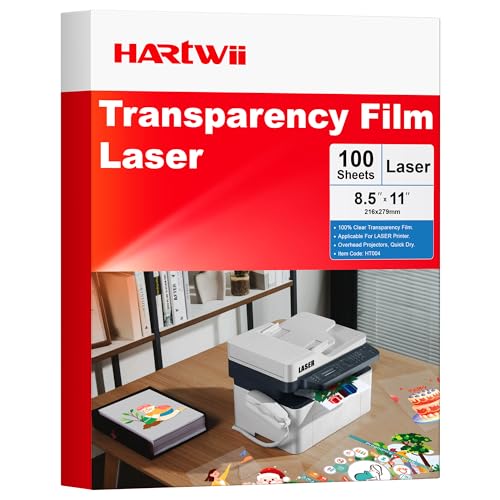
Creates the opaque positive needed to block UV light during exposure. Laser printer output is sharper than inkjet. If you don't have a printer, draw directly on the film with opaque black marker.
As an Amazon Associate I earn from qualifying purchases. Prices may change.
Step-by-Step Guide
Create your transparency and coat the screen
Print a high-contrast black-and-white design on transparency film using a laser printer—inkjet ink bleeds. Size it with 2-3 inches of border and keep details thicker than 2mm. In dim light, pour photo emulsion along one screen edge and drag it across with your coating scoop in one smooth motion. Flip and coat the other side. Dry flat in a dark closet for 2-4 hours until tacky but no longer wet.
💡 Pro Tips:
- • Bold shapes survive the process better than delicate linework
- • A dark bathroom with the door closed works if you don't have a closet
Expose the screen to UV light
Tape your transparency ink-side-down to the coated screen's underside. Place it flat outside in direct sunlight or under a UV lamp, then cover with glass or acrylic to press everything tight. Expose for 15-20 minutes in bright sun (longer if overcast). The emulsion under your design stays soft while the rest hardens.
💡 Pro Tips:
- • A picture frame's glass works perfectly for contact pressure
Wash out your stencil
Spray both sides of the screen gently with lukewarm water at the sink or with a hose. After 30-60 seconds, the unexposed emulsion dissolves and your design opens up in the mesh. Use medium pressure—don't blast it. When the image is clear and you can see through, dry it completely with a fan.
💡 Pro Tips:
- • If emulsion won't wash out, you overexposed—add more time in shade next attempt
Set up your print station and pull
Tape your fabric patch flat to a board (cardboard wrapped in plastic bag works). Place your screen on top, design aligned. Scoop fabric ink along the top edge outside your design area. Hold the screen firm, angle your squeegee at 45 degrees, and pull the ink across in one steady stroke with even pressure. Lift carefully.
💡 Pro Tips:
- • If the print looks patchy, flood the screen by pushing ink back without pressure, then pull again
- • Your first pull will likely be crooked—the rhythm comes by the fifth one
Cure the ink permanently
Let your print dry flat for 24 hours. Heat-set it by ironing the back for 3-5 minutes on high, or tumble dry on high for 30 minutes. This bonds the ink so it survives washing. Wait 48 hours before the first test wash.
Gear Up for Your Quest
The gear that makes this quest work.
Pull it off

Screen Printing Starter Kit
The screen and emulsion are the core of the process—110 mesh is the sweet spot for fabric because it lets enough ink through without bleeding. Pre-stretched frames save you hours of setup frustration.
+ complete the kit — 4 more

Fabric ink stays flexible after curing so prints don't crack when you move. Water-based means easy cleanup with soap and water, unlike plastisol which requires solvents.
Water-based fabric ink in your chosen color (black or white are most versatile)
Get on Amazon · $12.99 — Speedball Fabric Screen Printing Inkdetails & deals →
Creates the opaque positive needed to block UV light during exposure. Laser printer output is sharper than inkjet. If you don't have a printer, draw directly on the film with opaque black marker.
Pack of clear acetate sheets that your printer can print on
Get on Amazon · $14.84 — Transparency Film for Inkjet/Laser Printersdetails & deals →
UV Flashlight (365nm)
RecommendedLets you work at night or in winter without relying on sunlight. A 21-LED UV flashlight can expose a small screen in 20-30 minutes. Also useful for finding weak spots in your stencil after wash-out.
Handheld UV light for checking emulsion cure and exposing small screens indoors
Get on Amazon · $49.99 — UV Flashlight (365nm)details & deals →
Natural Canvas Fabric Patches
RecommendedCanvas holds ink beautifully and doesn't fray like raw cotton. Starting with pre-cut patches lets you focus on printing technique without wrestling fabric scissors. You can sew or iron these onto jackets, bags, or jeans after printing.
Pre-cut blank canvas squares (4x4 or 5x5 inches) ready for printing
Get on Amazon · $14.99 — Natural Canvas Fabric Patchesdetails & deals →RELATED GEAR GUIDE
Fermentation & Canning Kit: 8 Beginner Picks
Field-tested picks · Creative Arts
As an Amazon Associate, IRL Sidequests earns from qualifying purchases at no extra cost to you.
Prices and availability are subject to change. The price shown at checkout on Amazon at the time of purchase will apply.
Editor's Picks
Hand-selected quests our team thinks you'll love

Dawn Patrol: Your First Bird Watching Adventure
Wake up with the birds and see your neighborhood through new eyes.

Creative Skills Quest Hub: Learn By Doing
The best way to learn creative skills? Make bad art until it gets good.

Hand-Built Ceramic Bowl Workshop
Your hands built the first bowls 20,000 years ago. They still can.