Urban Texture Block Printing - Creative Arts quest for Beginner level adventurers

Urban Texture Block Printing

That rusted fire escape pattern? It belongs on a tote bag.

Share:
Time
3-4 hours
Cost
Free with your own gear
Starter gear from $42
5 supplies · see the gear
Who it's for
All ages welcome
Level
Beginner
Where
Both
Season
Year-round

About This Quest

Create wearable art by carving city textures into linoleum blocks and printing them on fabric—manhole covers, brick patterns, and architectural details become your gallery.

Block printing turns urban archaeology into wearable art. You're not just observing the city's textures—manhole covers, decorative grates, weathered brick, Art Deco building details—you're translating them into carved blocks that stamp those patterns onto fabric. The process connects observation, carving, and printing into one satisfying loop. The outdoor portion is a texture hunt with your phone camera. You're looking for high-contrast surfaces: the diamond plate on a loading dock, the honeycomb pattern on a vintage drain cover, the repetitive geometry of a building facade. Back at your workspace, you carve those patterns into soft linoleum blocks using basic cutting tools. The first print always surprises you—what looked rough in the carving suddenly becomes crisp and intentional on fabric. This works best with simple, bold patterns. Avoid photorealistic attempts. The beauty is in reduction—capturing the essence of a texture in five or six carved lines. A weathered brick becomes three horizontal gouges and two vertical cuts. A manhole cover's radial lines become a sunburst pattern. Once you've nailed the carving, you can print dozens of items: tote bags, tea towels, patches for jackets. The city stops being scenery and starts being your design library.

Why This Quest Matters

The first print always surprises you—what looked rough in the carving suddenly becomes crisp and intentional on fabric. You walk away with wearable pieces that carry actual patterns from your city's surfaces, not generic designs from a screen. The city stops being scenery and starts being your design library.

What You'll Experience

  • How to read your city for high-contrast, carvable patterns
  • The satisfying loop of simplifying complex textures into bold, printable designs
  • Block carving and fabric printing techniques that work on totes, towels, and patches
  • How reduction—not detail—creates striking prints
  • A repeatable process for turning urban archaeology into functional art

What You'll Need

Top gear to make this quest great.

Pull it off

Linoleum Block Carving Set

Soft-cut linoleum carves cleanly without the elbow strain of traditional battleship linoleum—critical for beginners tackling geometric patterns

4.2 (31)
Get on Amazon · $23.99 — Linoleum Block Carving Set
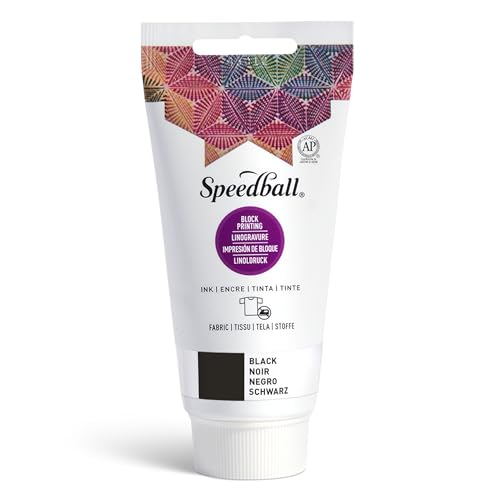
Fabric Block Printing Ink

Textile-specific ink stays flexible after drying and survives washing—craft acrylic will crack

$11.99 — buy Fabric Block Printing Ink on Amazon
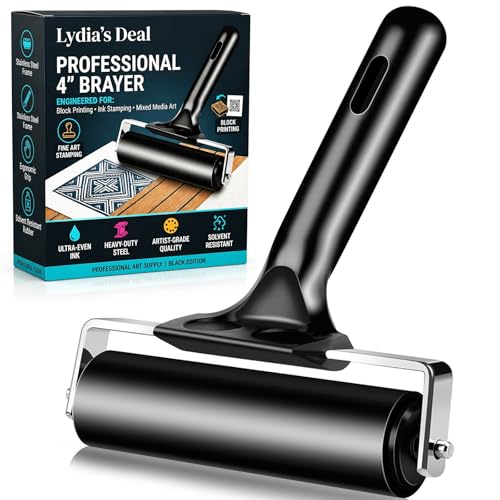
Soft Rubber Brayer

Rolls ink into an even, thin layer that captures fine carved details—foam brushes create streaky, uneven coverage

$6.49 — buy Soft Rubber Brayer on Amazon
View all 5 supplies

As an Amazon Associate I earn from qualifying purchases. Prices may change.

Step-by-Step Guide

1

Hunt textures in your neighborhood

Walk for 30 minutes photographing geometric patterns with strong contrast—grates, architectural moldings, industrial surfaces, manhole covers. Shoot in direct sunlight to capture shadow detail. Collect 5-8 options.

💡 Pro Tips:

  • • Diamond plate, vintage drain covers, and Art Deco building details photograph especially well
  • • High contrast matters more than visual complexity
2

Simplify your pattern on paper

Pick your strongest texture and sketch it at actual carving size (3x3 or 4x4 inches). Reduce it to essential lines—a weathered brick becomes three horizontal gouges and two vertical cuts. Block printing rewards boldness over detail.

💡 Pro Tips:

  • • Aim for five or six carved lines maximum to capture the essence
3

Transfer and carve your block

Move your design onto linoleum using transfer paper or permanent marker. Carve away negative space with a V-gouge for outlines and U-gouge for larger areas, always cutting away from your body. After 15 minutes, test-print on scrap paper to check progress.

💡 Pro Tips:

  • • Remember your carving prints in reverse—text and directional patterns need to be flipped
4

Run test prints on scrap fabric

Roll fabric ink thinly and evenly onto your carved block with a brayer. Press the block onto scrap fabric for 10-15 seconds with firm, even pressure using a clean roller or wooden spoon. Print 3-4 impressions to dial in your pressure and ink amount.

💡 Pro Tips:

  • • Thin, even coats of ink beat thick gloppy layers every time
  • • Peel back one corner to check the impression before lifting completely
5

Print your final piece

Secure your fabric flat with tape or a non-slip mat. Apply your dialed-in technique to print tote bags, tea towels, or jacket patches. Multiple impressions create pattern repeats. Let prints dry flat for 24 hours, then heat-set with an iron on cotton setting for 3-5 minutes to make them washable.

Full gear guide
Home Recording Studio Kit: 10 Picks for 2026
See all picks →

Gear Up for Your Quest

You bring the curiosity. We've found the tools.

Pull it off

Linoleum Block Carving Set

Linoleum Block Carving Set

Soft-cut linoleum carves cleanly without the elbow strain of traditional battleship linoleum—critical for beginners tackling geometric patterns

4.2 (31)
Get on Amazon · $23.99 — Linoleum Block Carving Setwhat to look for & our pick →
+ complete the kit — 4 more
Fabric Block Printing Ink
$11.99
4.6 (1,568)

Textile-specific ink stays flexible after drying and survives washing—craft acrylic will crack

Water-based textile ink in black or primary color (4 oz jar)

Get on Amazon · $11.99 — Fabric Block Printing Inkwhat to look for & our pick →

Soft Rubber Brayer
$6.49
4.7 (723)

Rolls ink into an even, thin layer that captures fine carved details—foam brushes create streaky, uneven coverage

4-inch rubber roller for inking blocks

Get on Amazon · $6.49 — Soft Rubber Brayerwhat to look for & our pick →

Unbleached Canvas Fabric
$16.99
4.4 (794)

Natural canvas shows ink contrast beautifully and provides enough texture to grip ink without bleed-through

Pre-washed canvas tote bags or yard fabric

Get on Amazon · $16.99 — Unbleached Canvas Fabricwhat to look for & our pick →

Transparent Transfer Paper
4.6 (7,709)

Transfers your simplified sketch to linoleum with precision, eliminating wobbly freehand marker lines that lead to carving mistakes

Graphite transfer sheets for design transfer

Get on Amazon · $3.99 — Transparent Transfer Paperwhat to look for & our pick →

RELATED GEAR GUIDE

Home Recording Studio Kit: 10 Picks for 2026

Practical picks, real prices · Creative Arts

As an Amazon Associate, IRL Sidequests earns from qualifying purchases at no extra cost to you.

Prices and availability are subject to change. The price shown at checkout on Amazon at the time of purchase will apply.

Editor's Picks

Hand-selected quests our team thinks you'll love

Dawn Patrol: Your First Bird Watching Adventure - Creative Arts quest

Dawn Patrol: Your First Bird Watching Adventure

Wake up with the birds and see your neighborhood through new eyes.

Discover the hidden world of birds in your local area through mindful observation and learn to identify common species by sight and sound.

2-3 hoursGear from $7
Beginner
View Quest
Dawn Patrol: Your First Bird Watching Adventure
Creative Skills Quest Hub: Learn By Doing - Creative Arts quest

Creative Skills Quest Hub: Learn By Doing

The best way to learn creative skills? Make bad art until it gets good.

Skip the theory. Build actual creative skills through practical projects—from sketching to pottery to music production.

2-4 hours per skill sessionGear from $25
Beginner
View Quest
Creative Skills Quest Hub: Learn By Doing
Candle Making Magic - Creative Arts quest

Candle Making Magic

Today, you're going to melt, scent, and pour your own glowing candles from scratch.

Transform raw wax into glowing works of art by melting, scenting, and pouring your own custom candles. You'll measure and melt wax, blend fragrances to create signature scents, position wicks in decorative containers, and watch as liquid transforms into solid—emerging with hand-poured candles that fill your space with ambiance and your chosen aroma. This tactile craft combines chemistry and creativity, teaching you the fundamentals of candle composition while you design candles perfectly suited to your aesthetic and scent preferences.

2+ hoursGear required
Beginner
View Quest
Candle Making Magic

Not this one?

Get a different side quest in 30 seconds

Tell the generator how much time you have, who you're with, and your mood — it picks from 500+ quests like this one.

Try the real life side quest generator

Or browse the full list of real-life side quest ideas.

Your weekend just got more interesting.

One new adventure idea every Thursday — plus this quest saved to your account. Free, unsubscribe anytime.

By continuing you agree to the Terms and Privacy policy.