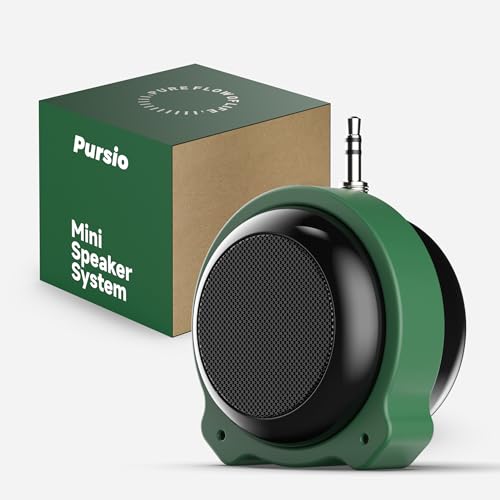
Finish your theremin, plug it into a small speaker, and play a sliding note for someone in the room. Then hand it over and challenge them to hold one steady tone without wobbling.
Bonus challenge: Take turns playing a simple tune the other person has to guess, no touching and no hints.
Accept this questSaves it to your list, no account needed.
Time
6-8 hours over 2-3 sessions
Cost
Free with your own gear
Starter gear from $155
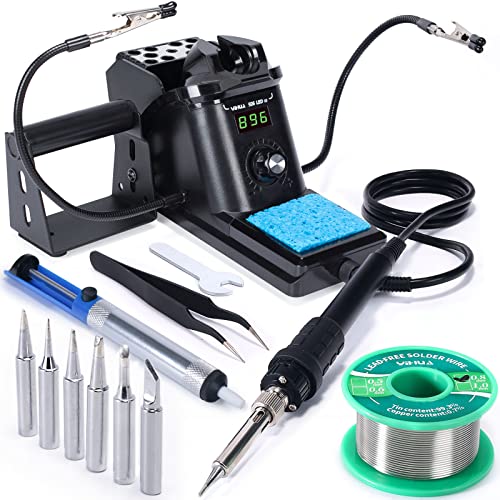
The theremin kit runs about $50. If you don't own them yet, a temperature-controlled soldering station is around $50, a multimeter about $35, and a small powered speaker roughly $25–60. Solder and a bit of shielded cable are a few dollars.
solo, friends, family · Teens 14+ with an adult present for all soldering and power-on steps; builders under 16 need an adult the whole way
Level
Intermediate
Where
Indoor
Season
Year-round
About This Quest
Want to make music without touching anything? Over two or three sessions you'll solder a theremin kit together, stand up its two antennas, and tune it until a wave of your hand pulls a clear tone out of the air. Bring a friend for the first wobbly note.
A theremin is the instrument you play by waving your hands near two metal antennas. One hand sets the pitch, the other sets the volume, and your fingers never touch it. Right now it's a bag of parts on your table. By the end, it sings.
You'll sort the pieces, solder them in one at a time, stand up the antennas, then tune it until your hand a foot away gives you a steady tone. Never soldered before? The kit walks you through it joint by joint, and the only skill is going slow. Then you hand it over and watch someone else try.
Why This Quest Matters
Most instruments make you wait years for a sound worth hearing. This one answers the very first time you move your hand, and the thing answering is a thing you built. Watching a friend wave their arms at your homemade instrument, laughing at the siren noise they just made, is worth every quiet hour of soldering.
What You'll Experience
Pull a note from thin air: Move your hand near the copper rod and a tone appears with nothing touching.
Make the joints shine: Watch each one go from dull grey blob to smooth silver cone.
Find the sweet spot: Tune it so a hand a foot away gives you a clear, singing note.
Hand it to a friend: Let someone else swoop their arms around and make the goofiest sound in the house.
What You'll Need
Top gear to make this quest great.
Pull it off
Theremin DIY Electronics Kit or Component Set
Gives you the matched coils, adjusters and board that are a nightmare to source separately.
As an Amazon Associate I earn from qualifying purchases. Prices may change.
Before You Begin
Pick a table you can leave covered in parts for a few days, because this is a two or three session build. Essentials: a theremin kit (the board, the matched coils and variable capacitors, and the copper antenna tubing), a temperature-controlled soldering iron with a fine tip, rosin-core solder, a multimeter, safety glasses, and a small powered speaker with a 3.5mm input. Handy extras: a helping-hands clamp with a magnifier, so the board stays put and sloppy joints show up; flush cutters for trimming leads; and a printed copy of the kit's wiring diagram to tick off as you go. Follow the kit's own instructions wherever they differ from ours.
Safety Tips
A good quest stays a good story. These are general notes; your gear's manual, the venue's rules and local law come first.
Solder fumes should not reach your face. Open a window, aim a fan so it pulls air away from you, and wash your hands before you eat.
Treat the iron tip as blazing hot (350°C) at all times. It lives in its stand between joints, the cord stays clear of your elbow, and if it falls you let it fall. Keep a first-aid kit and burn gel on the table.
Wear safety glasses when you trim leads, and point the cut ends down and away. Those little wire snips really fly.
Unplug the power before you move a wire, resolder anything or change an antenna connection, and check the power polarity twice before the first switch-on. Keep drinks, cleaning alcohol and damp cloths off the bench while the circuit is powered, and water an arm's reach away from a mains-powered speaker.
Builders under 16 need an adult right there for every soldering and power-on step, and the kit's instructions outrank anything here on values and wiring.
Step-by-Step Guide
1
Lay Out the Parts
40 min
Open the kit and spread it out like a surgeon's tray. Sort the resistors and capacitors into little groups by value, using the kit's wiring diagram as your map. Set up a bright lamp and get the fan pulling air out the window. Heat the iron and wipe the tip, then melt a touch of solder onto it so it gleams. That shine is what makes every joint after this easy.
💡 Pro Tips:
• Tape each sorted group to a sheet of paper with its value written beside it. You'll never second-guess a resistor again.
2
Solder the First Oscillator
60 min
This is the heart of the instrument, and it's quieter work than you expect. Start with the shortest parts, the resistors and small capacitors, then the taller coils and transistors, so the board sits flat. Touch the iron to the pad and lead together, feed in solder for a second, pull the solder away, then the iron. A good joint is shiny with a smooth cone around the lead. Trim the leads, then finish this circuit completely before touching the next.
💡 Pro Tips:
• Dull and grainy means the joint didn't take. Reheat it for a couple of seconds and add a whisper more solder.
3
Solder Its Twin
60 min
Same rhythm, second circuit, and here's the trick you're building: one of these two circuits holds a steady note while the other shifts when your hand comes near the antenna. The gap between them is the sound you'll hear. Work through it in the same order and check each joint as you go. Hold the board under a magnifier and look for stray solder bridging two neighbouring pads.
💡 Pro Tips:
• Your multimeter will beep if two spots are accidentally joined. Thirty seconds of beeping now saves an hour of head-scratching later.
4
Stand Up the Antennas
60 min
Now it starts looking like an instrument. Mount the variable capacitors, then stand the pitch antenna, a copper rod 10 to 12 inches tall, on the right side on standoffs that keep it isolated from ground. Put the volume antenna, the loop or plate, on the left. Keep them at least 6 inches apart or they'll muddle each other. Wire the power with the polarity double-checked, use shielded cable for the power and audio jack, and add a cable tie at each antenna connection so nothing can tug a wire loose.
💡 Pro Tips:
• Clear metal away from the antennas. A steel ruler or a laptop sitting nearby will drag your tuning around.
5
Tune It Till It Sings
75 min
The moment you've been building toward. Check the polarity once more, power on, and plug into the speaker with the volume low. Now turn the pitch adjuster until your hand held a foot from the rod gives you a clear, singing tone, roughly two octaves above middle C. Then set the volume side so it's silent when your hand is far away and loud when it's 2 to 3 inches from the loop. If the pitch wanders, unplug, check your antenna connections and reheat any joint that looks rough.
💡 Pro Tips:
• Stand still while you tune. Your whole body shifts the field, so leaning in moves the pitch with you.
6
Box It and Play It
60 min
Mount the board in a wooden or plastic box, antennas still 6 inches apart and metal kept clear. Then play. Your right hand toward the rod lifts the pitch, your left hand away from the loop brings up the volume. Slide from low to high, hunt for a note you like, hold it. Once you can steer a tone, call someone in, play them a swooping siren, and put it straight into their hands.
💡 Pro Tips:
• Curl your pitch hand slowly rather than swinging your arm. Small finger moves give you far more control than big gestures.
You turned a bag of parts into an instrument you play by waving at it. Call the next person through the door over and dare them to hold one steady note.
The Secret Sounds of Solid Things: A Contact-Mic Vibration Safari
Everything solid is humming. You just need the right ears.
Grab a friend and go listen to things that aren't making any sound. A contact mic sticks to a fence, a tree, a storefront window, and suddenly you hear traffic traveling through steel. Walk a 2km loop with five stops, then mix your best finds into a 90-second piece.
Grab a friend and turn a spare room, closet or basement corner into a recording space that actually sounds good. You'll find the echo with a clap, hunt down the trouble spots with a mirror, hang treatment in the corners, then record a voice that sounds clean and close.