
Screen Print Your Own Band Posters
Turn your kitchen table into a print shop and make posters that look like they cost $40 at the merch table.
About This Quest
Learn DIY screen printing to create limited-edition posters using affordable supplies and basic household tools.
Screen printing feels like magic the first time you lift the screen and see a crisp image on paper. The squeegee drags thick ink across the mesh, and suddenly your design exists in the physical world. You can smell the plastisol or water-based ink drying, hear the satisfying scrape of each pull. This isn't about perfection—your first few prints will be uneven, and that's the point. Real screen printing has texture, slight misalignments, and ink buildup that makes each poster unique. You'll start with a single-color design because multi-color registration is where beginners get frustrated. Think bold shapes, high contrast, limited detail. Band names, geometric patterns, or simple illustrations work best. The exposure process is straightforward: coat your screen with photo emulsion, let it dry in darkness, place your transparency on top, blast it with a UV light source (a work lamp with a photo bulb works), then wash out the unexposed emulsion with a shower head. What remains is your stencil. The actual printing happens fast once your screen is ready. Tape off your margins with masking tape, load ink along the top edge, and pull firmly with your squeegee at a 45-degree angle. The first print always looks too light—add more ink or increase pressure. By print five or six, you'll find your rhythm. Run 20-30 copies and you've got a limited edition. Number them, sign them, and you've just made something that looks professional enough to sell.
Why This Quest Matters
You'll hold a stack of posters that look like they came from a real print shop, each one slightly different in a way that makes them more valuable, not less. The smell of drying ink, the rhythm of pulling prints, the satisfaction of a clean image appearing under the screen—screen printing gives you a tangible skill that turns digital files into objects people want to hang on their walls. Plus you'll never look at band posters the same way again.
What You'll Experience
- How to burn a photo emulsion screen using UV light and transparencies
- The squeegee technique that produces clean, even prints
- Why slight imperfections and misalignments make handmade prints more valuable
- How to set up registration marks for consistent multi-print runs
- The difference between water-based and plastisol inks in practice
What You'll Need
Top gear to make this quest great.
Pull it off
Pre-stretched screen printing frame
The foundation of screen printing—mesh tension determines print quality and a pre-stretched frame saves hours of frustration compared to DIY stretching
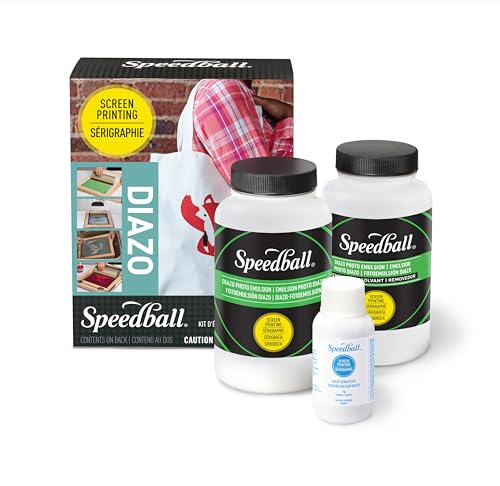
Creates the UV-reactive coating that becomes your stencil—without this you can't transfer designs to your screen
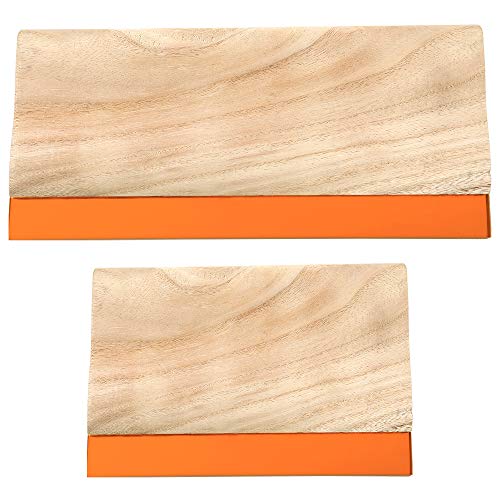
Pushes ink through the mesh with even pressure—blade hardness affects ink deposit and print sharpness
As an Amazon Associate I earn from qualifying purchases. Prices may change.
Step-by-Step Guide
Design and Print Your Transparency
Create a high-contrast black and white design sized to your screen dimensions—start with 8x10 inches. Bold shapes and simple illustrations work best for first prints. Print it on transparency film (office supply stores can do this if your printer can't).
💡 Pro Tips:
- • Test your design contrast by holding the transparency up to light—solid black areas should block light completely
- • Avoid fine details and gradients; they'll wash out during exposure
Coat Your Screen with Emulsion
In a dark room, hold your clean screen at 45 degrees and drag the emulsion scoop across the mesh in one smooth motion on both sides. Let it dry completely for 2-4 hours in total darkness—even a crack of light can ruin the coating.
💡 Pro Tips:
- • A hair dryer on cool setting speeds drying but keep it in darkness
- • Thin, even coats work better than thick ones
Expose and Wash Out Your Screen
Place your transparency film image-side down on the dry emulsion, put glass or acrylic on top for contact, and expose under UV light for 10-20 minutes. Rinse with lukewarm water starting gently—the unexposed emulsion washes away revealing your stencil. Spray from both sides until the design is completely clear.
💡 Pro Tips:
- • First exposure timing is a guess—test on a scrap screen if possible
- • Hold the finished screen up to light to check for pinholes and patch with emulsion if needed
Set Up Your Print Station
Once the screen is bone dry, tape off any open mesh around your design with masking tape. Tape corner marks on your work surface so every sheet of paper aligns exactly the same way. This registration system keeps your prints consistent.
💡 Pro Tips:
- • Print a few test sheets to dial in your registration before starting the real run
Pull Your First Prints
Load a thick line of ink along the top edge of the screen. Hold the squeegee at 45 degrees and pull firmly toward you in one smooth stroke, then lift immediately. Your first print will look too light—add more ink or increase pressure. By print five or six you'll find your rhythm.
💡 Pro Tips:
- • Too much ink bleed means less ink or a steeper squeegee angle
- • Keep a scrap sheet nearby to test adjustments before printing on good paper
Print Your Run and Clean Up
Once you've dialed in pressure and ink amount, print 20-30 copies for a limited edition. Let them dry flat for 24 hours. Clean your screen immediately with warm water (water-based inks) or screen wash (plastisol)—dried ink is nearly impossible to remove.
💡 Pro Tips:
- • Number and sign your prints (like 12/30) to make them feel official
- • Store screens flat and completely dry so they're ready for your next design
Gear Up for Your Quest
The gear that makes this quest work.
Pull it off

Pre-stretched screen printing frame
The foundation of screen printing—mesh tension determines print quality and a pre-stretched frame saves hours of frustration compared to DIY stretching
+ complete the kit — 4 more

Creates the UV-reactive coating that becomes your stencil—without this you can't transfer designs to your screen
Light-sensitive emulsion and sensitizer for creating stencils
Get on Amazon · $29.99 — Photo emulsion kitdetails & deals →
Squeegee with rubber blade
EssentialPushes ink through the mesh with even pressure—blade hardness affects ink deposit and print sharpness
Screen printing squeegee sized to your screen width (70-80 durometer hardness)
Get on Amazon · $9.99 — Squeegee with rubber bladedetails & deals →
Water-based screen printing ink
EssentialProduces vibrant, matte prints with easy water cleanup—better for beginners than plastisol which requires chemical solvents
Speedball or similar water-based ink (easier cleanup than plastisol)
Get on Amazon · $9.99 — Water-based screen printing inkdetails & deals →
150-watt UV bulb work lamp
RecommendedProvides consistent UV exposure for emulsion curing—dramatically faster and more reliable than sunlight exposure which varies by weather and time of day
Clamp work lamp fitted with UV exposure bulb for emulsion hardening
Get on Amazon · $15.99 — 150-watt UV bulb work lampdetails & deals →RELATED GEAR GUIDE
Fermentation & Canning Kit: 8 Beginner Picks
Field-tested picks · Creative Arts
As an Amazon Associate, IRL Sidequests earns from qualifying purchases at no extra cost to you.
Prices and availability are subject to change. The price shown at checkout on Amazon at the time of purchase will apply.
Editor's Picks
Hand-selected quests our team thinks you'll love

Dawn Patrol: Your First Bird Watching Adventure
Wake up with the birds and see your neighborhood through new eyes.

Creative Skills Quest Hub: Learn By Doing
The best way to learn creative skills? Make bad art until it gets good.

Hand-Built Ceramic Bowl Workshop
Your hands built the first bowls 20,000 years ago. They still can.