
Screen Print Your Own Street Sign Series
Turn worn street corners into wearable art with DIY screen printing.
About This Quest
Learn to screen print vintage street sign designs onto fabric using photo emulsion and squeegee techniques.
Screen printing captures the raw typography of city streets—those faded stop signs, rusted route markers, and hand-painted shop numbers that give neighborhoods their visual character. This isn't about buying vintage posters; you're making your own prints from scratch using photo emulsion, a squeegee, and fabric ink. The process connects you to a maker tradition that predates digital design, where every layer requires physical pressure and timing. You'll build a simple wooden screen frame (or repurpose an old picture frame), coat it with light-sensitive emulsion, burn your street sign design into the mesh using a bright lamp, and pull ink through the screen onto tote bags or t-shirts. The first few prints will teach you about ink consistency and pressure—too much floods the design, too little leaves gaps. By your fifth pull, you'll feel the rhythm: position, pour, pull, lift. The smell of textile ink and the satisfying scrape of the squeegee make this tactile in ways a printer never will. Start with high-contrast black-and-white designs—YIELD signs, route numbers, directional arrows. Once you nail registration (aligning multiple layers), you can build two-color prints that mirror the weathered paint layers on actual street signs. Each print becomes a conversation piece: "This is from the corner where my bus always runs late" or "That's the one-way sign everyone ignores."
Why This Quest Matters
You're turning overlooked urban typography into physical objects you can wear or hang—prints that carry the visual DNA of your neighborhood's corners. By your fifth pull, you'll feel the rhythm of the squeegee and understand why screen printers talk about their craft with reverence. Each finished piece becomes a conversation starter that connects strangers to the places they walk past every day.
What You'll Experience
- How to burn photo emulsion and create reusable screen printing stencils
- The tactile rhythm of squeegee pressure, ink consistency, and layer registration
- Why street sign typography works as bold, high-contrast design
- Heat-setting technique to make fabric prints permanent and washable
- The satisfaction of making wearable art with your hands instead of a printer
What You'll Need
Top gear to make this quest great.
Pull it off
Screen Printing Frame Kit with Mesh
Provides the foundation for your photo emulsion stencil and ensures even ink distribution across fabric
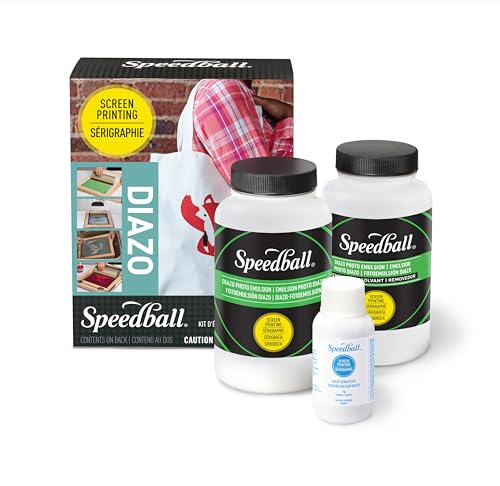
Allows you to burn detailed designs into the screen mesh using light exposure, capturing fine typography and texture
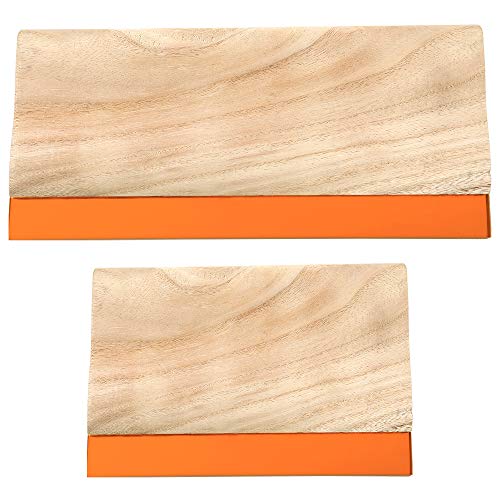
Controls ink pressure and distribution—the right squeegee angle and firmness make the difference between muddy prints and crisp lines
As an Amazon Associate I earn from qualifying purchases. Prices may change.
Safety Tips
- The Speedball Diazo sensitizer bottle will feel unfilled but it's not empty—it's a very thick oil that requires water to reach the right consistency. Follow the mixing instructions carefully before adding to the photo emulsion.
- While Speedball's Diazo Photo Emulsion can be mixed under normal light, always dry and store your coated screens in complete darkness for 4-6 hours to prevent premature hardening before exposure.
Step-by-Step Guide
Shoot and print your transparency
Photograph street signs with bold, simple typography—stop signs, route markers, directional arrows. Convert your image to pure black-and-white using threshold adjustment in photo editing software. Print onto Uinkit transparency film (8.5x11 inches) using a dye ink inkjet printer, making sure to use the coated side indicated on the package back.
💡 Pro Tips:
- • High contrast is everything—muddy grays won't block light properly during exposure
- • Test your black-and-white conversion by printing on regular paper first
Coat your screen with emulsion
Use the Caydo 8x10 inch wood silk screen frame with 110 white mesh pre-stretched (tap it to check tension). Mix Speedball Diazo Photo Emulsion by adding sensitizer, then coat both sides of your screen with thin, even layers using a squeegee under normal light. Let dry completely in darkness for 4-6 hours—the emulsion should look matte, not shiny wet.
💡 Pro Tips:
- • Add water to the thick sensitizer oil first to make mixing easier
Burn your design into the screen
Tape your transparency to the bottom of the dry screen and place it on a black surface (fabric or foam board). Expose to a 500W halogen work light or strong LED for 10-15 minutes—the light hardens emulsion everywhere except where your design blocks it. Spray with cold water in a sink; your design washes out, leaving open mesh. Let dry completely.
💡 Pro Tips:
- • Keep the light source 12-18 inches above the screen for even exposure
Pull your first print
Tape pre-washed fabric (cotton, polyester, linen, rayon, or other synthetics) to a flat surface. Position your screen on top, pour a line of Speedball Fabric Screen Printing Ink across the top edge, then pull firmly across with the Caydo squeegee (9.4 or 5.9 inch) at a 45-degree angle using the 75 durometer rubber blade. Lift carefully—you've made your first print.
💡 Pro Tips:
- • Too much ink floods the design; too little leaves gaps—you'll find the sweet spot by your third pull
- • Keep the squeegee at a consistent angle throughout the stroke
Cure and refine your series
Let prints dry flat for 24 hours, then heat-set with an iron on cotton setting for 3-5 minutes through parchment paper to make the Speedball ink permanent and washable. Print at least 5-10 copies to refine your technique—each one will be slightly different, capturing the weathered character of the street signs that inspired them.
Gear Up for Your Quest
The gear that makes this quest work.
Pull it off

Screen Printing Frame Kit with Mesh
Provides the foundation for your photo emulsion stencil and ensures even ink distribution across fabric
+ complete the kit — 4 more

Allows you to burn detailed designs into the screen mesh using light exposure, capturing fine typography and texture
Light-sensitive emulsion and diazo sensitizer for creating stencils
Get on Amazon · $29.99 — Photo Emulsion Kit with Sensitizerdetails & deals →
Speedball Squeegee with Rubber Blade
EssentialControls ink pressure and distribution—the right squeegee angle and firmness make the difference between muddy prints and crisp lines
Rubber-edged tool for pulling ink across the screen (8-10 inch width)
Get on Amazon · $9.99 — Speedball Squeegee with Rubber Bladedetails & deals →
Water-Based Textile Ink Set
EssentialBonds permanently to fabric after heat-setting, giving you washable prints that match the faded, layered look of street signs
Fabric screen printing ink in primary colors (black, white, red, blue)
Get on Amazon · $12.99 — Water-Based Textile Ink Setdetails & deals →
Transparency Film or Acetate Sheets
RecommendedCreates crisp, opaque stencils that block UV light cleanly during screen exposure, capturing fine details and sharp edges
Clear sheets for printing or drawing high-contrast designs
Get on Amazon · $7.99 — Transparency Film or Acetate Sheetsdetails & deals →RELATED GEAR GUIDE
Fermentation & Canning Kit: 8 Beginner Picks
Field-tested picks · Creative Arts
As an Amazon Associate, IRL Sidequests earns from qualifying purchases at no extra cost to you.
Prices and availability are subject to change. The price shown at checkout on Amazon at the time of purchase will apply.
Editor's Picks
Hand-selected quests our team thinks you'll love

Dawn Patrol: Your First Bird Watching Adventure
Wake up with the birds and see your neighborhood through new eyes.

Creative Skills Quest Hub: Learn By Doing
The best way to learn creative skills? Make bad art until it gets good.

Hand-Built Ceramic Bowl Workshop
Your hands built the first bowls 20,000 years ago. They still can.